v4 Azure Quickstart
If you were redirected here after purchasing Senzing Entity Resolution in the Azure Marketplace , a license is emailed within 3 business days to the email address of the purchasing Azure account. In the meantime, follow the guide below to get started. Contact Senzing Support for any questions.
SENZING® SDK with ENTITY CENTRIC LEARNING® and SMARTER ENTITY RESOLUTION® technologies.
SENZING INSIDE™. CONNECT DATA. POWER INTELLIGENCE.™
Senzing is an Entity Resolution SDK that allows organizations to resolve and deduplicate records across multiple data sources. This Azure-specific deployment guide provides a structured approach for setting up Senzing v4 using Azure Virtual machines and a database (SQLite or Azure SQL Database Hyperscale). Senzing is designed to be source and destination agnostic, meaning customers define their own ingestion and consumption patterns based on their enterprise architecture.
Senzing provides a free license for 500 source records when downloading the Senzing® SDK. If you subscribe to the free trial on Azure Marketplace , you are provided a free license for 250k source records. If you require additional records for an evaluation, or any assistance when following this guide, contact Senzing Support . Support is 100% FREE!
SENZING® SDK with ENTITY CENTRIC LEARNING® and SMARTER ENTITY RESOLUTION® technologies.
SENZING INSIDE™. CONNECT DATA. POWER INTELLIGENCE.™
Azure deployment options
There are two options for deploying Senzing on Azure:
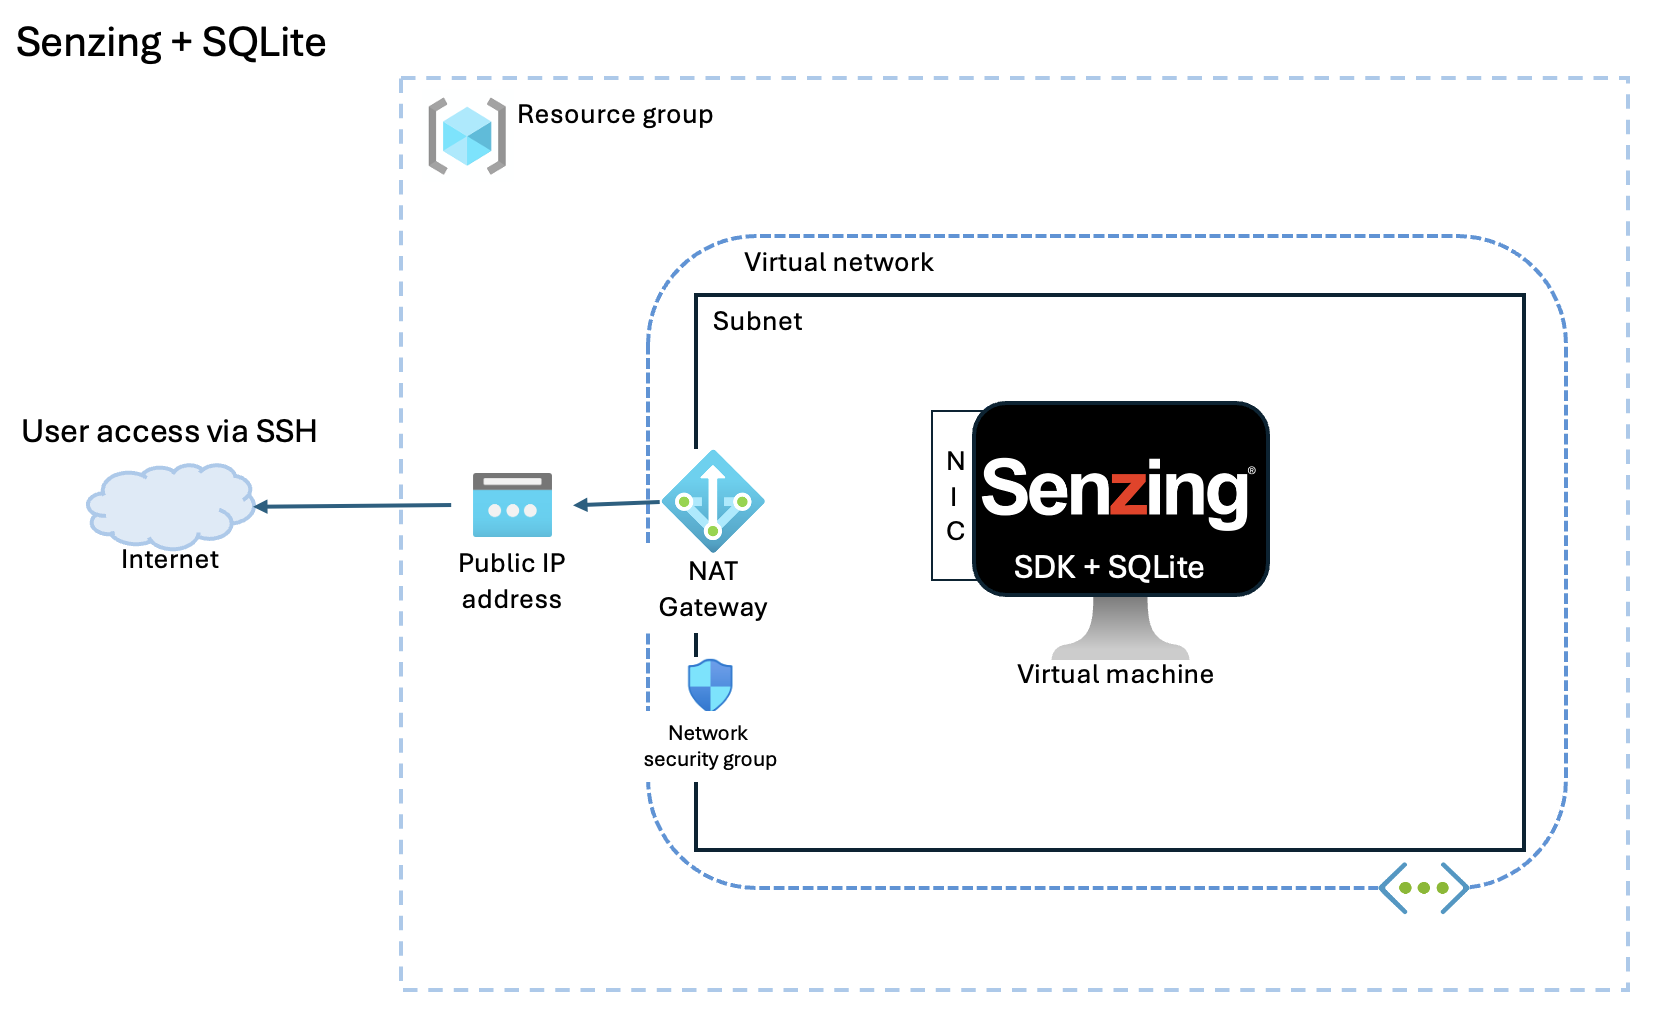
- SQLite-based Deployment (<1M records): Excellent for testing and the quickest no-dependency setup
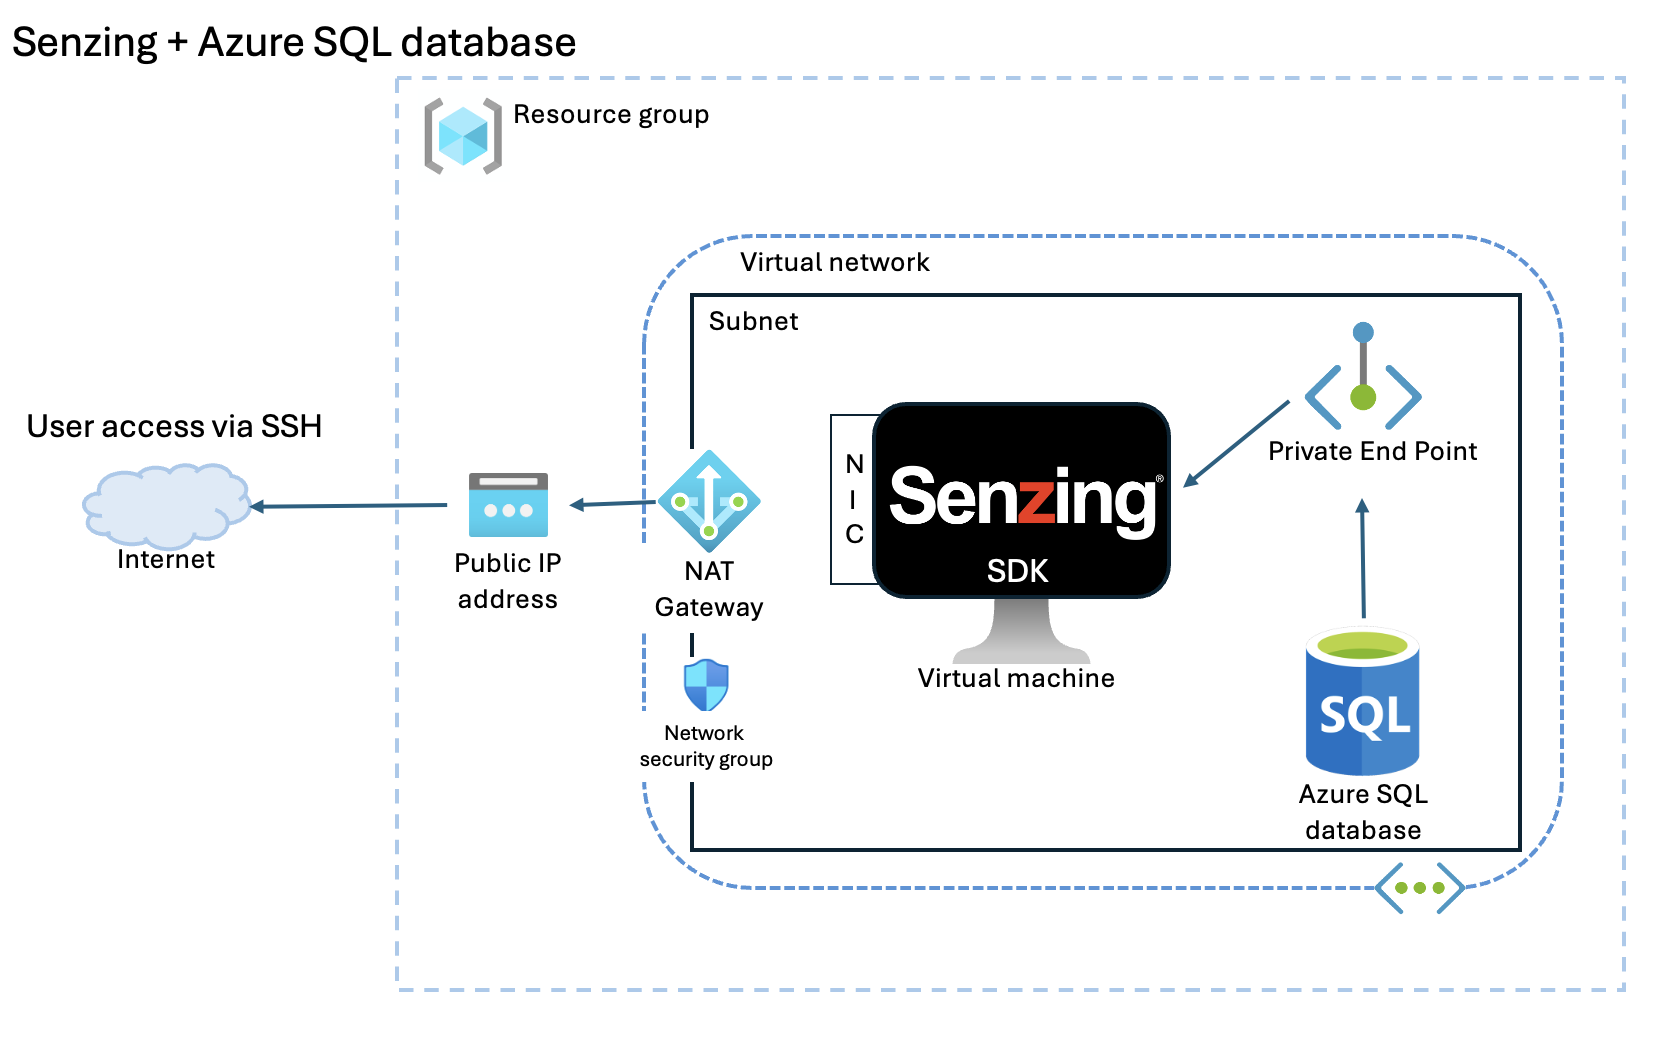
- Azure SQL Database Hyperscale-based Deployment: Recommended for scalability and performance
SQLite-based deployment (<1M records)
Excellent for testing and the quickest no-dependency setup.
Azure SQL Database Hyperscale-based deployment
Recommended for scalability and performance.
Security & data encryption
Senzing does not require root privileges and can be completely air-gapped and requires no connectivity beside to your database. Data security is managed by the customer’s Azure security policies. All data is stored in the customer’s controlled environment database.
Cost considerations
Cost Modeling: Compute Virtual machine, Database, Storage, Networking Data transfer costs
- Use the Azure Pricing Calculator to estimate your Azure cost.
Prerequisites
Before deploying Senzing on Azure, ensure you have:
- Azure Account with administrative privileges
- Basic Linux command-line knowledge
- Understanding of Azure Virtual machines and Azure SQL Database
- Security best practices such as IAM role restrictions and least privilege access
Azure deployment instructions - SQLite and Azure SQL Database Hyperscale
Step 1: Launch Virtual machine
- Open
Azure Portal→All Services→Virtual machines→Create→Azure Virtual Machine - Basics:
- Resource Group: choose or create new.
- Choose an image:
Ubuntu 24.04 LTS - x64 Gen2 - Choose a size (minimum):
Standard_D2s_v3(<1M records) orStandard_D8ds_v6 - Set up an Administrator account.
- Inbound port rules: Allow Public inbound traffic to SSH (22)
- Note: this is for testing purposes only, use the Advanced controls to set up more secure networking.
- Disks:
- OS Disk size based on SQLite usage and record quantity.
- Networking:
- Virtual Network: create new or assign.
- Public IP: create new or assign.
- Delete NIC when VM is deleted: Select if desired.
- Advanced:
- Performance (NVMe): selected as need and if supported by image.
- Review + Create
- Download the .pem file and create the Virtual machine.
Step 2: Install Senzing SDK and test
- When deployment is complete go to the new Virtual machine. (The “Go to resource” button.)
- Note the public IP address in the overview of the Virtual machine.
- Locally, from the cmdline, change permissions on the .pem file
chmod go= <path-to>/<filename>.pem - SSH into your Virtual machine.
ssh -i <path-to>/<filename>.pem azureuser@<ip address> - Follow the Senzing v4 Linux Quickstart Guide .
OPTIONAL: Connect to Azure SQL Database Hyperscale
Step 3: Launch an Azure SQL Database Hyperscale
- Go to
Azure Portal→All Services→Azure SQL Database Hyperscale→Create - Basics:
- Resource Group: use same as used for the Virtual machine.
- Database: SZ
- Server: choose or create new.
- Use SQL Authentication and save uid/pwd
- Additional settings:
- Collation: SQL_Latin1_General_CP1_CI_AS
- Review + create
- Create
- When created:
- Go to resource
Step 4: Configure Virtual machine to connect to Azure SQL Database
- Install SQLCMD on the Virtual machine:
curl https://packages.microsoft.com/keys/microsoft.asc | sudo tee /etc/apt/trusted.gpg.d/microsoft.asc
curl https://packages.microsoft.com/config/ubuntu/24.04/prod.list | sudo tee /etc/apt/sources.list.d/mssql-release.list
sudo apt-get update
sudo apt-get install mssql-tools18 unixodbc-dev
echo 'export PATH="$PATH:/opt/mssql-tools18/bin"' >> ~/.bash_profile
source ~/.bash_profile
-
Allow the Virtual machine to access the Azure SQL Database via Private Endpoint:
- Open the Azure SQL Database resource, if not opened.
- On the overview tab, click the Server name.
- Click Show network settings.
- Private access
- Create private endpoint
- Basics:
- Name: Eg. SzQuickStart
- Next several times.
- Review + create
- Create
-
Test the database connection from the Virtual machine:
sqlcmd -S <database server name> -U <database admin user> -P "<database admin user password>" -I -Q "select name from sys.databases;"
Results:
name
--------------------------------------------------------------------------------------------------------------------------------
master
SZ

(2 rows affected)
Step 5: Set up Senzing schema and connect to Azure SQL Database
Senzing provides a detailed Azure SQL Database setup guide that works for any environment and covers:
- Database schema creation
- Configuring connection parameters
- Updating database with the Senzing Entity Resolution configuration
- Follow the Senzing Azure SQL Database Setup Guide .
Step 6: Apply Azure SQL database performance optimizations
- Follow the Tuning Your Database Azure SQL Database instructions.
If you have any questions, contact Senzing Support. Support is 100% FREE!